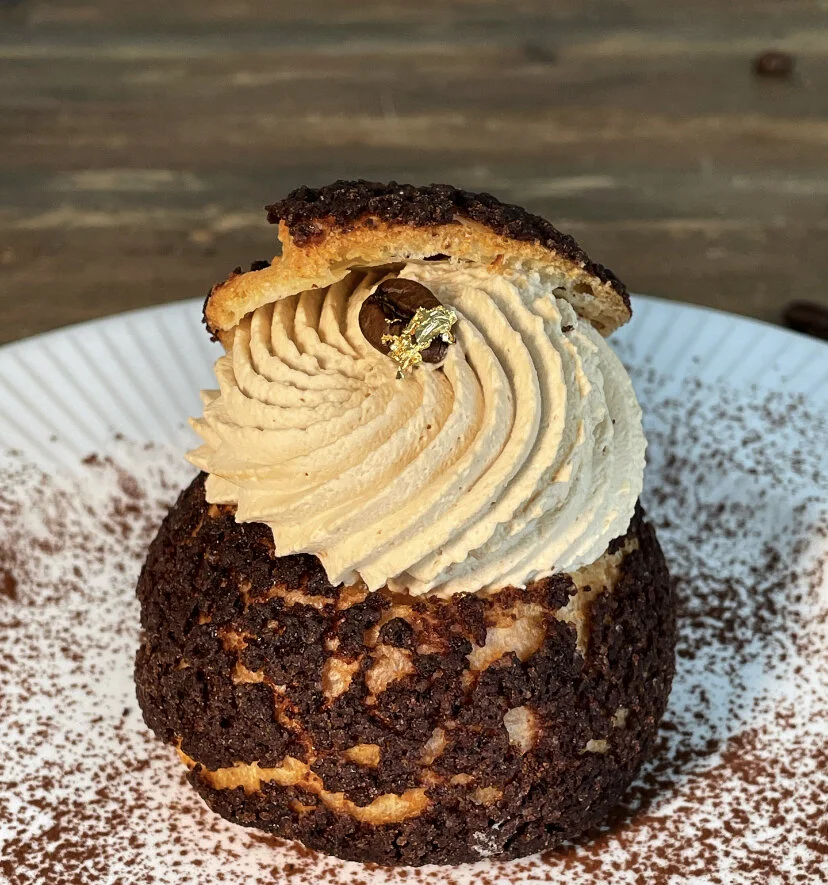
The TiramiChoux
Choux Pastry is one of my obsessions. I find fascinating the way it puffs up and I love the fact that it’s the perfect ‘container’ for any flavour combination.
The first time I made choux I was in University and made a gigantic bowl of profiteroles. It was a great success and it became a tradition: everytime someone had a house party I would make a giant bowl of profiteroles. Those bowls were epic and people still remember them after all this time.
Choux pastry can be scary but with a few tips it can be mastered in no time. I will add a series of tips in the ‘Tips & cheats” section at the end of this post.
Tiramisù is hands down one of the best and most recognisable flavours out there. As with all famous things there are thousands of versions and variants. I prefer to stick to the classic ones: Mascarpone and egg cream, coffee & cocoa.
I filled my TiramiChoux with Mascarpone & egg cream, topped it with a big swirl of coffee whipped cream and added some cocoa craquelin on top of my choux buns.
Here is the recipe for my TiramiChoux. Have fun!

Ingredients
Choux
60g unsalted butter
60g water
60g milk
60g strong white flour
1g salt
2g caster sugar
100-120g eggs
Cocoa Craquelin
45g demerara sugar
45g butter
40g flour
10g cocoa powder
Mascarpone & Egg Cream
3 eggs
185g mascarpone
90g caster sugar
Coffee Whipped Cream
300g double cream
2 tbsp caster sugar
3 tsp instant coffee (granules)
Decoration
Coffee Beans
Golden Leaf

Step by Step
Craquelin
Mix the softened butter, sugar, cocoa & flour together
When the dough starts coming together place it on a piece of parchment paper and place another sheet on top. Roll the dough out between the 2 sheets. The thickness should be around 3-4mm
Place it flat in the freezer for 30 min or until it freezes
Choux
In a pan heat up the sugar, salt, water, milk and butter
As soon as it starts boiling add in the flour and stir until a ball forms. This ball should easily detach from the sides of the pot. This will roughly take a couple of minutes from the moment you pour the flour in. Transfer it in a bowl and let it cool down a bit
Transfer the pastry in your stand mixer or alternatively you can use a handheld mixer. Gradually add in the lightly beaten eggs. Do not add them in all at once. If you had choux pastry on a wooden spoon and you turn your spoon around with the pastry facing the floor, your pastry should very slowly drop from the spoon. If if drops quickly, you’ve lost the game and need to start over. For this reason add in your eggs gradually and wait until the pastry absorbs them. I used roughly 100g for this recipe but because egg sizes vary your sweet spot will be somewhere between 100-120g
You choux is ready!
Piping the Choux & Baking
Pre-heat your oven at 200-220 Fan
Transfer your choux pastry in a piping bag. You don’t need a piping nozzle, cutting the tip of the bag will be enough
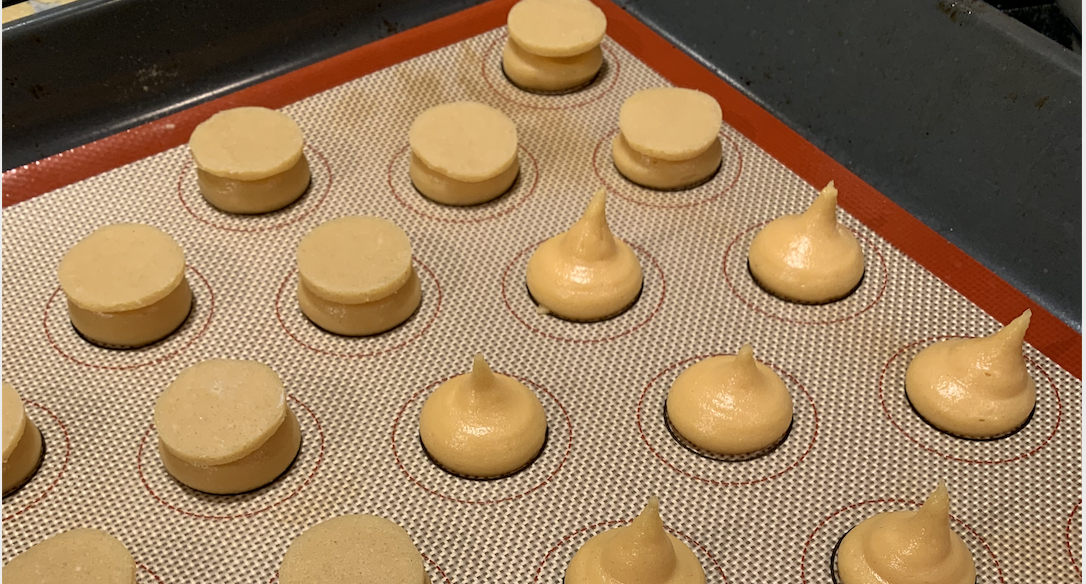
Pipe your choux in staggered and well distant rows. They should all have the same diameter. Mine were roughly 3 cm before baking. They will puff up a lot so don’t go crazy with the size
Take your craquelin out of the freezer and use a round cutter the same diameter as the base of your choux and cut little roundels
Place the little roundels on top of your piped choux and slightly press with your finger. The image below is a good reference of how they should look like. It’s obviously not my TiramiChoux Craquelin as it doesn’t have cocoa but, I forgot to take a picture so I am posting an older choux bake!
Put your tray in the oven for 20min. DO NOT OPEN THE OVEN!!!
After 20min, turn the oven down to 180/200FAN for further 15min
The time in the oven depends on the size of the choux. If your choux buns are big you will probably need an extra 5 to 10mins
Let them cool down
Mascarpone & Egg Cream
Take the mascarpone out and leave it at room temperature. Quickly beat it to break it down slightly and set aside
Separate the eggs from the egg whites
Beat the yolks with half the sugar at full speed and until is nice, fluffy and pale
Keep beating the yolks and sugar and gradually add in the Mascarpone one soon at the time. Once it’s incorporated, set aside
In a separate bowl, whip the egg whites with the remaining sugar to stiff peaks
With a spatula slowly fold in 1/3 of the egg whites in your yolk-Mascarpone cream. Repeat twice until the egg whites and cream are fully incorporated. Do this carefully as you do not want to knock down the air you incorporated both in your egg whites and yolks
Coffee Whipped Cream
Add the coffee granules in a bowl together with your double cream and start whipping them
Gradually add in the sugar and keep whipping the cream until you reach your desired consistency
Assembling
Cut a small roundel on top of your choux buns and put it aside
Pipe the Mascarpone cream inside the choux. You don’t need a nozzle for this one as the cream won’t be visible from the outside
Add your Coffee whipped cream in a piping bag with your preferred nozzle (I used a french star tip) and pipe a nice swirl on top of your choux
Add the little roundel on top (it looks like a little hat)
Place one coffee bean on top of the whipped cream and if you want add a small piece of golden leaf
Now it’s finally time to eat them!!!

Tips & Cheats
The Choux Edition:
Always add the eggs slowly and wait until it’s fully absorb before adding more. If you had choux pastry on a wooden spoon and you turn your spoon around with the pastry facing the floor, your pastry should very slowly drop from the spoon. If if drops quickly, you’ve lost the game and need to start over.
Milk and water in the choux pastry are interchangable at a 1:1 ratio. You can make choux just with water, just with milk or both as I did today.
Always preheat the oven. Your choux will not rise in a cold oven.
Never ever open the oven while you are baking choux. The steam will escape and you’ll end up with flat choux buns. I only open it at the end to check if they are ready.
When they are ready they lift off the parchment paper really easily and they are hollow.
If you are not 100% sure they are ready, just take 1 out of the oven and observe it for a couple of minutes. If it’s ready it won’t collapse and you can safely take the other ones out of the oven.
The craquelin not only is delicious but it also helps give you an even choux surface.
If you are not making craquelin, use a wet fork to slightly scratch the surface. This will help them expand evenly.